
Introduction
Solar energy is an increasingly popular and environmentally friendly way to power homes and businesses. One of the crucial aspects of a successful solar panel installation is choosing the right roof type. The suitability of your roof for solar panels can significantly impact the efficiency and longevity of your solar energy system. In this comprehensive guide, we will explore the key considerations, techniques, and best practices for installing solar panels on various roof types.
Why Roof Type Matters
The roof of your building plays a pivotal role in determining the effectiveness of your solar panel system. Here’s why:
- Sun Exposure: The angle and orientation of your roof influence how much sunlight your solar panels can capture. Roofs with south-facing or west-facing aspects are generally ideal for maximum sun exposure, but other orientations can work with the right adjustments.
- Shading: Nearby trees, buildings, or structures can cast shadows on your solar panels, reducing their efficiency. Different roof types may be more prone to shading, and understanding this can help you make informed decisions during installation.
- Roof Condition: The condition of your roof affects whether it can support the weight of solar panels. Some roof materials are better suited for solar panel installation than others, and an aging or damaged roof may need repairs or reinforcement before installation.
- Aesthetics: Solar panels are a visible addition to your property. The way they integrate with your roof’s design and materials can impact your property’s curb appeal and value.
Assessing Your Roof
Before you start the process of installing solar panels, it’s crucial to assess the condition and suitability of your roof. Here are the key steps:
- Roof Inspection: Begin with a thorough roof inspection. Look for signs of damage, leaks, or structural issues. If your roof is in poor condition, it may need repairs or replacement before solar panel installation.
- Roof Orientation and Angle: Determine your roof’s orientation (e.g., north, south, east, or west) and its angle (roof pitch). This information will help you calculate the solar panel tilt and positioning for optimal energy generation.
- Shade Analysis: Assess the potential shading on your roof throughout the day and across different seasons. Tools like shade analysis software or a solar pathfinder can assist in identifying shading issues.
- Roof Material: Different roof materials have varying levels of compatibility with solar panels. Asphalt shingles, metal roofs, clay tiles, and flat roofs all have unique considerations when it comes to installation.
- Structural Integrity: Consult with a structural engineer or a qualified solar installer to determine if your roof can support the added weight of solar panels and racking systems. Reinforcements may be necessary for some roof types.
Roof Types and Solar Compatibility
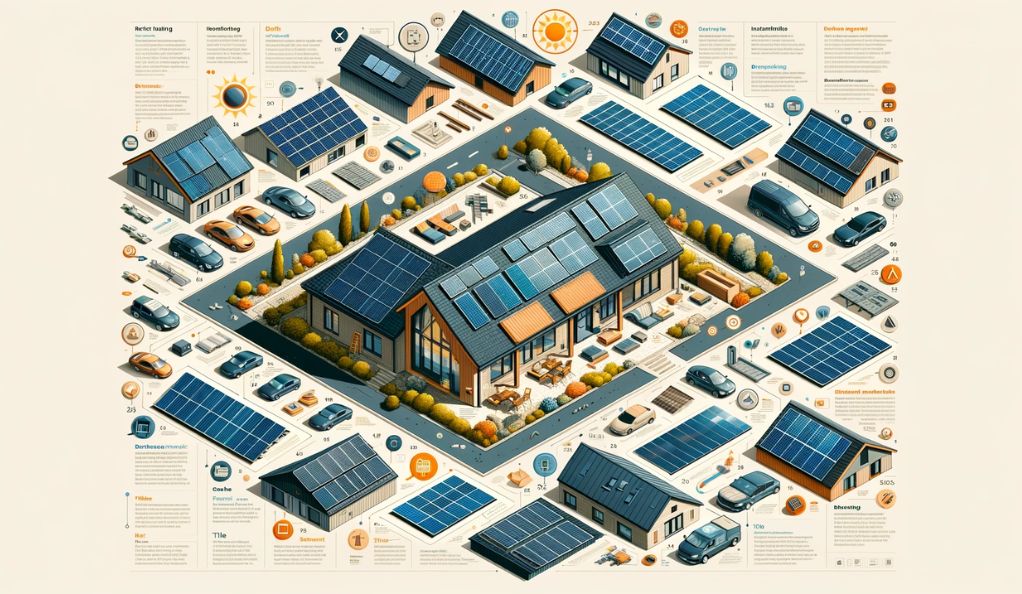
The type of roof you have plays a significant role in determining how well solar panels will work for your property. Different roof materials and styles come with their own advantages and challenges when it comes to solar panel installation. Let’s explore various roof types and their compatibility with solar panels:
- Asphalt Shingle Roofs: Asphalt shingle roofs are among the most common and compatible roof types for solar panel installation due to their ease of workability and weight-bearing capacity. Ensure shingle integrity before installation.
- Metal Roofs: Metal roofs, such as standing seam and corrugated metal, offer durability and longevity, making them excellent candidates for solar panels. Special mounting brackets designed for metal roofs are essential.
- Clay Tile and Concrete Tile Roofs: While clay and concrete tiles are aesthetically pleasing, their weight and fragility make solar panel installation more challenging. Careful planning and specialized mounting systems are necessary.
- Flat Roofs: Common in commercial buildings, flat roofs can support solar panels with the use of tilted mounting systems. Ballasted or penetrating mounting methods are employed without compromising the roof’s integrity.
- Slate Roofs: Slate roofs are renowned for their elegance and strength. Installing solar panels on slate roofs requires non-penetrating mounting systems to protect the delicate tiles.
- Wooden Shingle Roofs: Found on historic homes, wooden shingle roofs necessitate special precautions during solar panel installation, including specialized mounts and flashing systems.
- Green Roofs: Vegetated roofs can accommodate solar panels with elevated mounting systems to ensure sunlight exposure while requiring waterproofing and root barrier systems.
Mounting Systems and Installation Techniques
When it comes to installing solar panels on different roof types, selecting the right mounting systems and installation techniques is crucial. Your choice should align with your specific roof type and its requirements. Here’s an overview of these systems and techniques:
- Flush Mounts (For Asphalt Shingle Roofs): These mounts sit flush with the roof surface, providing a sleek appearance while reducing wind resistance. Proper sealing is essential to prevent water infiltration.
- Racking Systems (For Metal Roofs): These elevate solar panels above the metal roof, allowing air circulation to reduce heat buildup. Waterproofing and evenly distributing weight are critical considerations.
- Tile Hooks or Brackets (For Clay Tile and Concrete Tile Roofs): Designed to secure panels onto the ridges or hooks of tile roofs, these protect tiles from damage and require careful installation.
- Tilted Racks (For Flat Roofs): These allow solar panels on flat roofs to be angled for optimal sun exposure, maximizing energy production. Proper spacing and ballast weight calculations are necessary.
- Non-Penetrating Mounts (For Slate Roofs): These secure panels without drilling into slate roofs, safeguarding the delicate tiles while ensuring a secure attachment.
- Specialized Mounts (For Wooden Shingle Roofs): Designed to protect wooden shingle roofs from damage during installation, these mounts require expert installation to prevent potential harm.
- Elevated Mounts (For Green Roofs): These lift panels above the vegetation on green roofs, ensuring sunlight exposure and protecting the roof’s structural integrity with waterproofing and root barriers.
Choosing the right mounting system and installation technique is paramount for a successful solar panel system. Consulting with a professional installer experienced in your roof type is advisable to ensure both efficiency and roof integrity.
Permits and Regulations
To embark on a successful solar panel installation journey, it’s crucial to navigate the permitting process and comprehend the regulations that govern solar installations. Compliance with these regulations ensures a legal and safe installation. Here’s an overview of key considerations:
- Local Permitting: Begin by understanding your local requirements, including zoning permits and building permits. In historic districts, additional approvals may be needed to preserve architectural character.
- State Regulations: States often have interconnection standards and incentive programs. Ensure compliance with interconnection standards and explore available incentives and tax credits.
- Federal Regulations: The federal government offers the Investment Tax Credit (ITC). Familiarize yourself with ITC deadlines and eligibility. Additionally, consider environmental impact regulations for specific installations.
- Utility Regulations: Check with your utility provider for necessary approvals and net metering policies. Net metering determines how excess energy is credited or compensated.
- Safety and Code Compliance: Adhere to the National Electrical Code (NEC) and local electrical codes for safety. Building codes and fire safety measures must also be followed.
- Contractor Licensing: Choose a licensed and certified installer to ensure a professional job. Verify their credentials and licenses.
- Insurance and Liability: Confirm that your installer has liability insurance to cover potential damages or accidents during installation.
Hiring a Professional vs. DIY Installation
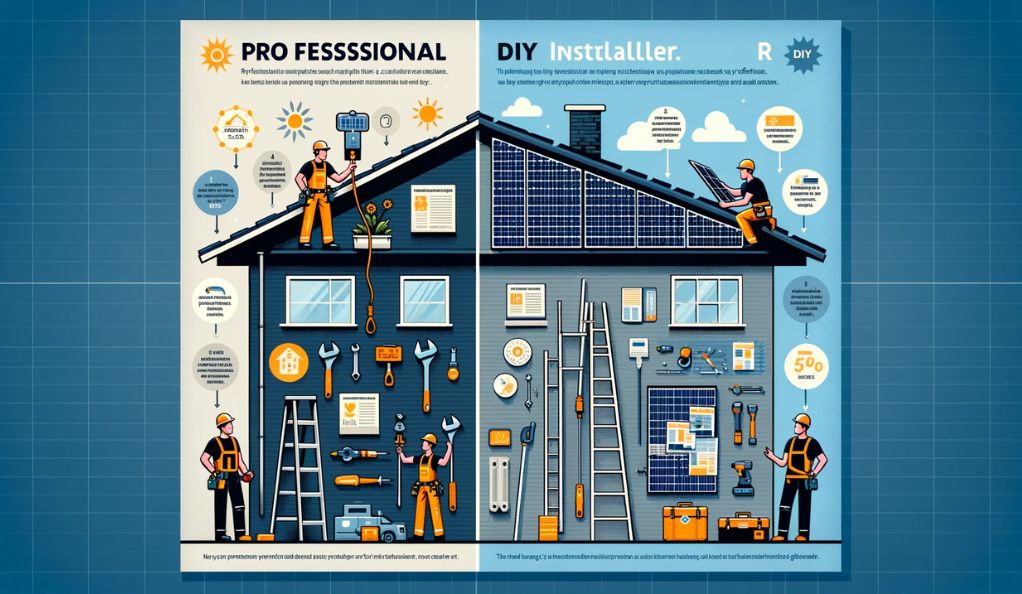
When considering the installation of solar panels, you have two primary options: hiring a professional installer or taking the do-it-yourself (DIY) approach. Each approach has its own set of advantages and disadvantages.
Hiring a Professional Installer has several benefits, including their expertise and experience in handling all aspects of the installation. Professionals efficiently assess your roof’s suitability, navigate permits and regulations, and ensure a smooth installation process. They often provide warranties and ongoing support, prioritize safety, and can complete the installation quickly. However, this option may be more expensive upfront, and scheduling may be subject to the installer’s availability.
On the other hand, DIY Installation offers cost savings, as it eliminates labor costs. It can also be a valuable learning experience, allowing you to gain knowledge and skills related to solar panel systems. DIY installation provides flexibility and control over the process and timeline. However, it can be complex and challenging, especially in terms of assessing roof suitability, obtaining permits, and meeting regulatory requirements. DIYers face a higher risk of errors, potentially resulting in reduced system efficiency, safety hazards, or costly repairs. Additionally, DIY installations may lack the same warranties and support as professional installations and can be time-consuming and physically demanding.
Before making a choice, carefully evaluate your skills, resources, and comfort level with the installation process. If opting for the DIY route, ensure thorough self-education, seek local permitting and regulatory guidance, and consider consulting professionals for advice.
Maintenance and Monitoring
To ensure the long-term performance and efficiency of your solar panel system, proper maintenance and monitoring are essential. Here’s a comprehensive overview of what you need to know:
- Cleaning and Inspection: Regularly clean your solar panels to remove dust and debris that can reduce efficiency. Use a soft brush or sponge with mild soap, avoiding abrasive materials. Additionally, visually inspect your panels for damage, loose connections, or shading issues from nearby obstructions.
- Inverter Maintenance: Inverters are critical components that convert DC electricity into usable AC electricity. Periodically check them for error messages and ensure proper ventilation to prevent overheating.
- Monitoring Systems: Consider investing in a monitoring system that provides real-time data on your system’s performance. These systems often have mobile apps or online portals for easy tracking of energy production and issue detection.
- Professional Maintenance: While homeowners can perform some maintenance tasks, scheduling periodic professional maintenance is advisable. Experienced technicians can identify and address potential issues that may not be immediately apparent.
- Seasonal Considerations: Be mindful of seasonal changes that can affect efficiency. Winter may bring snow accumulation on panels, while summer may result in higher energy production, requiring adjustments.
- Pest Control: Protect your system from potential pest damage. Install barriers or deterrents to keep birds, squirrels, or other pests away from your panels.
- Warranty and Repairs: Familiarize yourself with the warranties on your solar panels and components. In case of warranty-covered issues, contact the manufacturer or installer for necessary repairs or replacements.
- Energy Storage (if applicable): If you have an energy storage system like batteries, monitor their performance and ensure proper maintenance for reliable backup power.
- Regulatory Compliance: Stay updated on local regulations and utility requirements, especially if there are changes or updates in your area’s solar policies.
Conclusion
In conclusion, opting for solar panel installation on various roof types is a smart move towards sustainable energy usage. It’s essential to consider your roof’s compatibility and select appropriate mounting systems that align with your roof type. Navigating the permitting process and regulations at local, state, and federal levels is crucial to maximize incentives and ensure compliance.
When deciding between professional installation and a DIY approach, take into account your skills and resources. Professionals bring expertise but come with higher upfront costs, while a DIY approach can be cost-effective but demands significant effort and knowledge.