
Introduction to Solar Water Heating Systems
Solar water heating systems represent a sustainable and cost-effective solution for homeowners looking to reduce their energy costs and carbon footprint. By harnessing the sun’s energy, these systems provide a renewable source of heat for domestic water, making them an increasingly popular choice in today’s eco-conscious world.
The Basics of Solar Water Heating
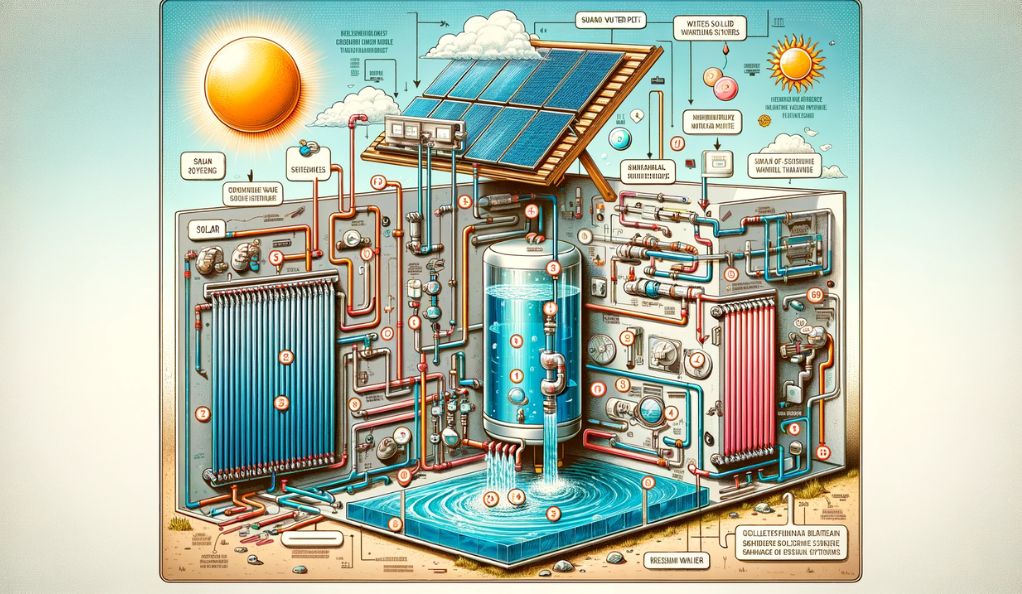
At its core, a solar water heating system comprises solar collectors and a storage tank. The collectors, usually mounted on the roof, absorb sunlight and convert it into heat. This heat is then transferred to the water stored in the tank. There are two primary types of solar water heating systems:
- Active Systems: These systems use pumps to circulate water or a heat-transfer fluid through the collectors. They are highly efficient and can be further categorized into direct circulation systems and indirect circulation systems.
- Passive Systems: Less complex and often less expensive, passive systems rely on gravity and natural circulation of water. Though they may be less efficient than active systems, they have fewer moving parts and can be more reliable over time.
Environmental Impact and Economic Benefits
Solar water heating systems have a significant positive impact on the environment. By reducing reliance on fossil fuels, they help in cutting down greenhouse gas emissions. Additionally, solar energy is an inexhaustible resource, making these systems a sustainable choice for long-term energy consumption.
From an economic perspective, the initial investment in a solar water heating system can be offset by the substantial savings on utility bills over time. While the upfront cost might seem daunting, the reduction in monthly energy expenses and potential government incentives can make solar water heating a financially sound decision.
Potential Savings
The savings accrued from a solar water heating system depend on several factors, including the system’s size, your geographical location, and your household’s hot water usage. Generally, a well-designed system can cover 50% to 80% of a home’s hot water needs, leading to significant savings in the long run.
Understanding the Basics of Solar Water Heating
In this section, we delve deeper into how solar water heating systems function, shedding light on their design and operational principles. Understanding these basics is crucial for anyone planning to build and install a DIY solar water heater.
Principle of Solar Water Heating
Solar water heating systems harness the sun’s energy to heat water for domestic use. The primary components of these systems include solar collectors and a water storage tank. The collectors, typically installed on the roof, absorb solar radiation and convert it to heat. This heat is then transferred to the water in the tank.
Types of Solar Collectors
There are mainly two types of solar collectors used in residential solar water heating systems:
- Flat-Plate Collectors: These are the most common and consist of an insulated, weatherproofed box containing a dark absorber plate under one or more glass or plastic (polymer) covers. Sunlight passes through the cover and heats the absorber plate, which then heats the fluid running through tubes attached to the plate.
- Evacuated Tube Collectors: These consist of rows of parallel, transparent glass tubes. Each tube contains a glass outer tube and metal absorber tube attached to a fin. The fin’s coating absorbs solar energy but inhibits radiative heat loss. These collectors are more efficient than flat-plate collectors, especially in colder conditions.
Types of Solar Water Heating Systems
Solar water heating systems are broadly classified into two categories:
Active Solar Water Heating Systems: These use pumps to circulate water or a heat-transfer fluid through the system. They can be direct or indirect systems.
- Direct Circulation Systems: Pumps circulate household water through the collectors and into the home.
- Indirect Circulation Systems: Pumps circulate a non-freezing heat-transfer fluid through the collectors and a heat exchanger, which heats the water that flows into the home.
Passive Solar Water Heating Systems: These are typically less efficient but more reliable and longer-lasting than active systems. They work on the principle of natural convection, where hot water rises and cold water sinks.
- Integral Collector-Storage Passive Systems: Suitable for areas where temperatures rarely fall below freezing. They work well in households with significant daytime and evening hot water needs.
- Thermosyphon Systems: Water flows through the system when warm water rises as cooler water sinks. The collector must be installed below the storage tank so that warm water will rise into the tank.
Solar Water Heating System Components
- Storage Tanks: These tanks store the heated water. Some systems have additional outlets and inlets connected to and from the solar collector.
- Heat Exchanger: Used in indirect systems, it transfers heat from the heat-transfer fluid to the water in the storage tank.
- Controllers: In active systems, controllers regulate the circulation of water or heat-transfer fluid.
Tools and Materials Required for DIY Solar Water Heater
Building a DIY solar water heater requires a set of specific tools and materials. This section provides a comprehensive list of what you’ll need, ensuring you’re well-prepared before beginning the project.
Tools Needed
- Drill: For making holes in the frame and storage tanks.
- Screwdriver Set: Various types, including flathead and Phillips, for assembling the frame and attaching components.
- Pipe Cutters and Tubing Cutter: Essential for cutting copper tubes and other piping accurately.
- Soldering Kit: For connecting copper pipes securely.
- Paintbrushes: For applying heat-absorbent paint to the collector and other components.
- Saw: A circular saw is recommended for cutting wood and metal accurately.
- Silicone Gun: Used for sealing joints and ensuring waterproof connections.
- Safety Equipment: Including gloves, goggles, and a mask, especially when cutting metal or soldering.
Materials Required
- Solar Collector: The heart of the system, which can be a flat-plate collector or evacuated tube collector.
- Storage Tank: To store the heated water. Preferably insulated to retain heat.
- Insulating Material: Such as fiberglass or foam, to minimize heat loss.
- Copper Tubing: For creating the heat exchanger and connecting the collector to the tank.
- Transparent Cover Glass: To protect the collector and trap heat.
- Wooden Planks and Metal Sheets: For constructing the frame and backing of the collector.
- Heat-Resistant Paint: Typically black, for the absorber plate to maximize heat absorption.
- Piping and Fittings: Including valves, adapters, and seals for connecting the system to your water supply.
- Mounting Hardware: For securing the collector to the roof or a suitable structure.
Preparing for the Build
Before you start, it’s crucial to plan your project:
- Measure and Design: Determine the size of your solar collector based on available space and your hot water needs. Sketch a design of your system.
- Site Selection: Choose a location with maximum sun exposure, usually a south-facing roof or ground space.
- Gather Materials: Source all the materials and tools listed. Some items can be found at hardware stores, while others might be available from specialized suppliers.
Step-by-Step Construction of a Solar Water Heater
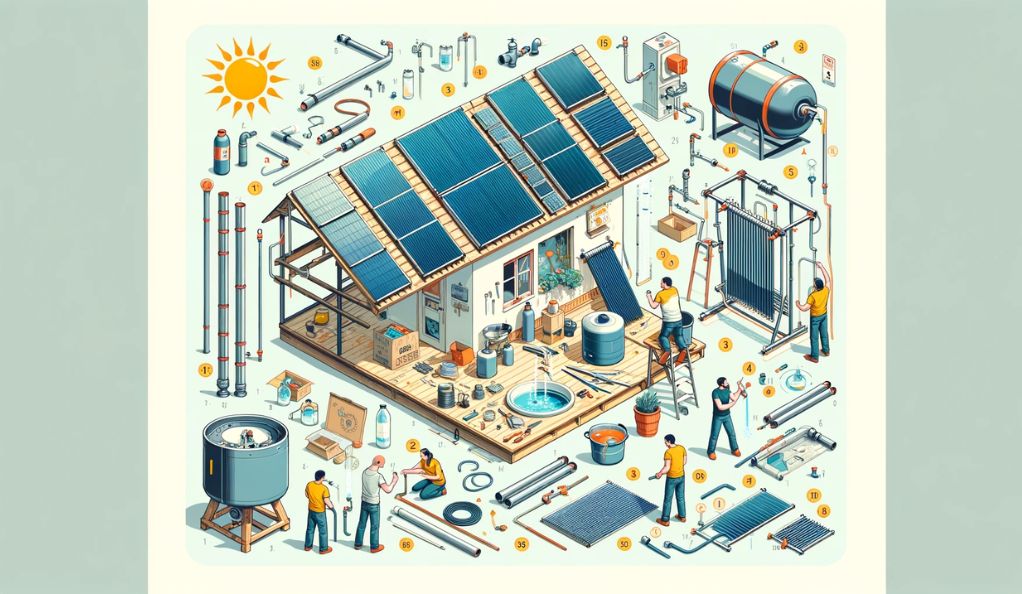
Constructing a DIY solar water heater can be a rewarding project. This section outlines the step-by-step process to build one, ensuring you can follow along even with basic DIY skills.
Step 1: Design and Build the Frame
- Measurements: Decide the size of your solar collector and cut wooden planks or metal sheets accordingly.
- Assembly: Construct a rectangular frame using screws or nails. Ensure it’s sturdy and weather-resistant.
- Angle Adjustment: For optimal sun exposure, angle the frame towards the south (in the Northern Hemisphere).
Step 2: Set Up the Collector
- Attach Copper Tubing: Securely fix copper tubes on the absorber plate or within the frame for the water to circulate.
- Painting for Absorption: Paint the absorber plate or inside of the frame with heat-resistant black paint to maximize heat absorption.
- Insulation: Add insulation material behind the absorber plate to minimize heat loss.
Step 3: Install the Glass Cover
- Measure and Cut: Measure the frame and cut your transparent cover glass or plastic to fit.
- Sealing: Attach the cover securely to the frame, ensuring it’s sealed to prevent heat loss.
Step 4: Plumbing Installation
- Piping: Connect the inlet and outlet pipes from the collector to the storage tank.
- Valves and Adapters: Install necessary valves and adapters for smooth water flow and temperature control.
Step 5: Connect to the Storage Tank
- Tank Preparation: If using an existing tank, ensure it’s clean and insulated. For a new tank, position it near the collector.
- Insulate Pipes: Insulate the pipes leading to and from the collector to retain heat.
Step 6: Install the System
- Mounting: Secure the solar collector to your roof or designated location.
- Connection: Connect the collector to the storage tank using insulated pipes.
- Safety Check: Ensure all connections are tight and leak-proof.
Step 7: Final Testing
- Leak Test: Run water through the system to check for any leaks.
- Performance Check: Test the system on a sunny day to ensure it heats water effectively.
Step 8: System Integration
- Integration with Home Plumbing: Connect your solar water heater to your home’s plumbing system.
- Back-Up System: Consider integrating a backup heating system for cloudy days.
Various DIY Solar Water Heater Designs
Exploring a variety of solar water heater designs can empower you to create a system that best fits your specific needs, whether it be for efficiency, cost-effectiveness, or adaptability to your living environment.
Thermosyphon Systems
Thermosyphon Systems utilize the principle of natural convection for water circulation, eliminating the need for pumps. These systems are efficient and relatively straightforward to construct. However, they require precise placement since the storage tank must be higher than the collector for the natural flow of water.
Barrel Solar Water Heater
The Barrel Solar Water Heater design transforms a common black-painted barrel into a cost-effective solar collector. It’s particularly suitable for small-scale applications or areas with moderate climates. This design stands out for its simplicity and minimal material requirement, making it an excellent choice for DIY beginners.
Solar Water Heater Using an Old Fridge
This innovative design repurposes an old refrigerator into a solar water heater. The insulation of the fridge aids in rapid water heating, showcasing a creative way of recycling household items. It’s an effective solution for those looking to upcycle while building a functional solar water heating system.
Portable Solar Water Heater
Designed for mobility, the Portable Solar Water Heater is compact and foldable, making it perfect for outdoor activities like camping. Its portability allows for easy transportation and setup in various locations, catering to temporary hot water needs in outdoor settings.
Copper Panels Solar Water Heater
Copper Panels Solar Water Heater employs copper tubes, known for their quick heating capability and excellent thermal conductivity. Though this design might be more costly due to the price of copper, its efficiency and durability make it a worthwhile investment for a long-lasting solar water heating solution.
Recycled Water Heater
The Recycled Water Heater concept is an eco-friendly approach, converting an old gas tank into a solar water heater. This design is particularly appealing to environmental enthusiasts and those interested in sustainable living practices. It allows for customization based on the materials available and personal preferences.
Integrated Collector Storage System
The Integrated Collector Storage System combines the solar collector and storage tank into one unit, simplifying the design and reducing the number of components. This system is especially beneficial in regions without freezing temperatures and is known for its straightforward construction and maintenance.
Installing and Positioning Your Solar Water Heater
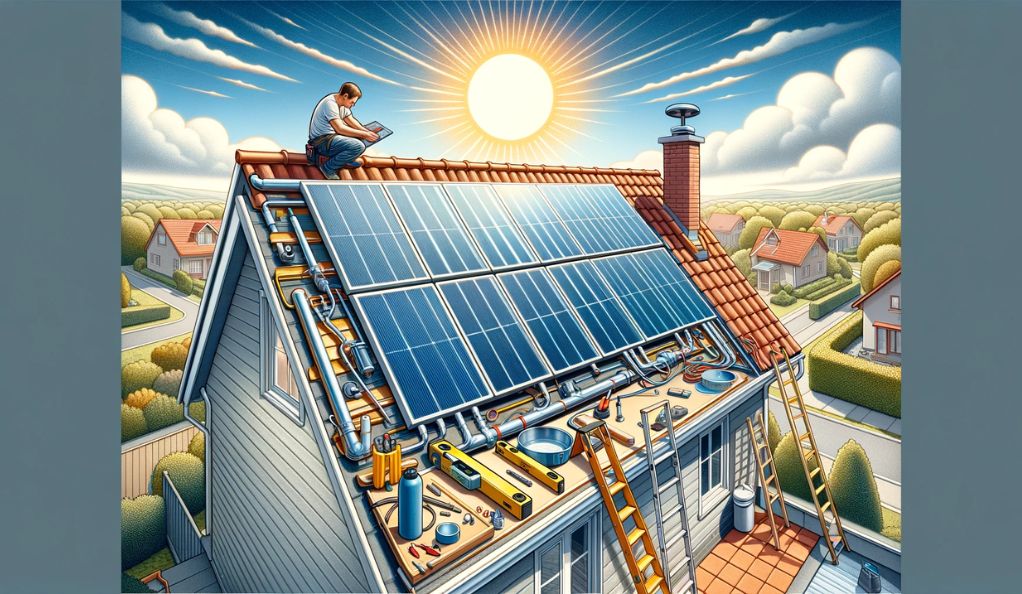
Proper installation and positioning are crucial for the efficiency of your DIY solar water heater.
Site Selection for Optimal Sun Exposure
Choosing the right location is key. In the Northern Hemisphere, aim to have the solar collector face south, with an optimal tilt angle that varies depending on the season. It’s essential to avoid shaded areas, especially during peak sunlight hours, to maximize sun exposure.
Mounting the Solar Collector
For roof installations, confirm that your roof can bear the system’s weight. Secure mounting brackets are crucial for both roof and ground installations. Precise alignment towards the south is critical for capturing maximum sunlight.
Connecting to the Water Storage Tank
The storage tank should be placed close to the collector to minimize heat loss. Insulating all connecting pipes is also vital. In thermosyphon systems, remember to position the tank above the collector.
Plumbing and Electrical Connections
Ensure leak-proof water connections between the collector and the tank. In active systems, install pumps and controllers correctly, adhering to safety and local electrical regulations.
Testing and Safety Check
After installation, check for leaks and test the system’s performance on a sunny day. Regular maintenance is crucial for lasting efficiency.
Maintenance, Troubleshooting, and Maximizing Efficiency
Maintaining, troubleshooting, and enhancing the efficiency of your DIY solar water heater is crucial for its optimal performance and longevity.
Regular Maintenance
Regular maintenance ensures that your solar water heater runs efficiently over the years. This includes cleaning the solar collector’s surface to remove dust and debris, checking for and repairing any leaks in the system, and inspecting insulation for any signs of wear and tear. Also, periodically check and, if necessary, replace the antifreeze solution in closed-loop systems.
Troubleshooting Common Issues
Common issues with solar water heaters include reduced heating efficiency, leaks, and blockages in the piping system. If you notice a significant drop in water temperature, inspect for any obstructions in the pipes or issues with the collector. Leaks should be addressed immediately to prevent damage to the system and your property.
Maximizing Efficiency
To maximize the efficiency of your solar water heater, ensure it is correctly sized for your household’s hot water needs. Positioning the collector at the optimal angle and direction for your geographical location is critical. Consider using a controller to regulate the flow of water or heat-transfer fluid based on temperature, reducing unnecessary circulation.
Seasonal Adjustments
Make adjustments to the system according to seasonal changes. This may include changing the angle of the collector or ensuring that the system is adequately protected against freezing temperatures in winter, especially for systems in colder climates.
Professional Inspection
Consider having a professional inspection periodically, especially if you encounter complex issues. A professional can provide in-depth maintenance and identify potential problems that might not be apparent to a non-expert.
Proper maintenance and troubleshooting are key to sustaining the performance of your DIY solar water heater. Regular checks, coupled with strategic adjustments, can significantly enhance the system’s efficiency and longevity, ensuring that you continue to enjoy the benefits of sustainable solar-heated water in your home.
Conclusion
Building a DIY solar water heater is a rewarding endeavor that combines environmental sustainability with energy savings. This guide aimed to equip you with the knowledge to choose the right system, understand its installation, and maintain it for optimal performance. While there’s an initial investment, the long-term benefits include reduced energy costs and a lower carbon footprint, making it a valuable addition to any eco-conscious household. For further detailed guidance and specific technical advice, consulting specialized resources in renewable energy and DIY projects is highly recommended.