
Introduction to DIY Solar Panel Installation
Embracing solar energy is not just an environmentally conscious decision, but also a financially smart one. With the advent of DIY solar panel installation, homeowners are finding it increasingly feasible to take control of their energy needs. This section of our guide introduces you to the basics of DIY solar panel installation, providing an insight into its benefits and challenges.
The heart of a DIY solar power system is the solar panel, a technology that converts sunlight into electricity. Opting for a DIY approach can significantly cut down the costs associated with professional installation, making solar power more accessible. However, it requires a good understanding of electrical systems and safe working practices, especially when working at heights.
Understanding Your Solar Energy Needs
Before diving into the installation of solar panels, it’s crucial to understand your home’s energy requirements. This step is fundamental in sizing your solar system appropriately to ensure it meets your electricity needs efficiently.
- Gathering Energy Usage Data
Start by collecting your utility bills for the past year. These bills will provide you with monthly and yearly insights into your energy consumption. Look for the total kilowatt-hours (kWh) used each month, as this will be the basis for calculating your average energy usage. - Calculating Average Monthly Usage
To find your average monthly energy usage, add up the total kWh for the last 12 months and divide by 12. This average is crucial in determining the size of the solar system required to meet your household’s energy demands.
Example Calculation:
Total kWh for 12 months = 6000 kWh
Average Monthly Usage = 6000 kWh / 12 months = 500 kWh/month
- Considering Seasonal Variations
Energy usage often varies with the seasons. For instance, your consumption might be higher in winter due to heating. Recognizing these patterns helps in designing a solar system that can handle peak demands. - Anticipating Future Energy Needs
Think about any upcoming changes that might affect your energy consumption, such as adding new appliances or an electric vehicle. Planning for these changes ensures that your solar system won’t become inadequate too soon. - Understanding Solar Panel Efficiency
Solar panels are rated by their capacity to generate electricity, typically in watts (W). Higher efficiency panels produce more electricity in the same space but may be more expensive. Your choice will impact the number of panels you need and the total system cost. - Estimating Solar Energy Production
Solar energy production varies by location. Use an online solar calculator or solar map to estimate the average daily solar energy production in your area. This figure helps in calculating the necessary system size.
Example Calculation:
Average Daily Solar Energy Production = 4 kWh/m²/day
System Size (kW) = Average Monthly Usage / Average Daily Production
                = 500 kWh / 4 kWh/m²/day = 125 kW
- Accounting for Losses and Panel Degradation
Solar panels slowly degrade over time, reducing their output. Additionally, inverter efficiency and shading can cause energy losses. Factor these into your calculations by slightly oversizing your system to compensate for these inefficiencies.
Choosing the Right Solar Panels and Equipment
When it comes to your DIY solar panel installation, choosing the right equipment is pivotal. This section guides you through the key considerations to ensure informed decisions tailored to your needs.
Types of Solar Panels
- Monocrystalline Panels: Known for high efficiency and sleek design, they are ideal for homes with limited roof space. However, they tend to be more expensive.
- Polycrystalline Panels: Slightly less efficient than monocrystalline but more affordable. They are a good balance of cost and performance.
- Thin-Film Panels: The most affordable and flexible, but also the least efficient. Best for large, unshaded areas.
Solar Inverters
- String Inverters: Ideal for systems without shading issues, they connect strings of panels together.
- Microinverters: Attached to each panel, perfect for roofs with partial shading as they optimize each panel individually.
- Hybrid Inverters: Combine the capabilities of both string and battery inverters, suitable for systems that might expand into battery storage.
Mounting Systems
- Roof Mounts: Common, maximize space, require a sturdy roof.
- Ground Mounts: Suitable for spacious yards or challenging roofs.
Additional Components
- Solar Batteries: For storing excess energy, especially in off-grid systems. Types include lead-acid, lithium-ion, and saltwater batteries.
- Charge Controllers: Regulate the voltage and current from the panels to the batteries, preventing overcharging.
- Monitoring Systems: Allow you to track the performance and output of your solar system in real-time.
Choosing the Right System Size
- Calculate based on energy needs and location’s solar potential.
- Oversize by 10-20% for efficiency and future needs.
Quality and Warranty
- Prioritize components with strong warranties and positive reviews.
- Standard panel warranty: around 25 years, inverter warranties vary.
Cost and Return on Investment
- Balance initial cost with long-term savings.
- Higher efficiency may mean more upfront cost but greater savings in the long run.
Making the right choices in solar panels and equipment is essential for a successful DIY installation. Consider efficiency, cost, roof space, shading, and future energy needs when selecting your solar system components. This will not only optimize your energy production but also ensure the longevity and efficiency of your solar energy system.
Designing Your Solar Panel Layout
Designing the layout of your solar panels is a crucial aspect of the installation process. This step determines how effectively your solar system will capture sunlight and generate power. Here’s a comprehensive guide to help you design a layout that maximizes efficiency and suits your specific location and circumstances.
Assessing Your Roof or Installation Area: Consider the orientation and angle of your solar panels; ideally, they should face south in the northern hemisphere. Check for potential shading from obstructions like trees or buildings, as shading can reduce efficiency. Ensure your roof is structurally sound to support the solar panels.
Solar Panel Mounting Options: Choose between flush mounting (cost-effective, panels lie flat against the roof) and tilted mounting (panels are angled for better efficiency but require more materials and space).
Panel Spacing and Layout: Maintain adequate spacing between panels to prevent shading and allow for maintenance. Optimize the arrangement to maximize roof space usage and sun exposure.
Roof Penetrations and Load Distribution: Minimize roof penetrations to reduce potential leaks and distribute the panel load evenly to avoid structural issues.
Accounting for Local Codes and Regulations: Check local building codes and homeowners’ association rules that may dictate installation guidelines or restrictions.
Using Design Software or Tools: Consider utilizing solar design software or online tools to visualize and plan your layout effectively, providing a virtual representation of your panels’ appearance and performance.
Professional Consultation: If your installation involves complex roofs or unique scenarios, seek advice from a solar professional or structural engineer.
Designing your solar panel layout requires careful consideration of various factors such as roof orientation, shading, local regulations, and structural integrity. A well-planned layout not only enhances the system’s efficiency but also ensures safety and compliance with local standards.
Getting Your Solar Panel Kit and Additional Tools
Embarking on the journey of DIY solar panel installation begins with gathering the right equipment and tools. This step is vital to ensure that your installation process is smooth and that your solar system functions efficiently and safely.
Purchasing Your Solar Panel Kit
When you’re ready to purchase your solar panel kit, it’s important to ensure that it contains all the necessary components for your project. Typically, a kit will include the solar panels themselves, an inverter, and a racking system. The choice of panels should be guided by your specific energy requirements, available roof space, and budget. Regarding inverters, select one that’s compatible with your system’s size and type. Microinverters can be a better choice for roofs with complex shapes or shading issues.
Additional Tools and Supplies
For a successful installation, you’ll need a variety of basic tools such as screwdrivers, wrenches, wire strippers, and pliers. Accurate placement and alignment of the panels are crucial, so include measuring and leveling tools like a tape measure, chalk line, and level in your toolkit. Prioritize safety by equipping yourself with safety glasses, gloves, a hard hat, and a harness, especially if you’ll be working at heights. Additionally, a power drill and saw will be necessary for installing the racking system, and don’t forget electrical tools like a multimeter for wiring tasks.
Selecting Mounting and Racking Systems
Choosing the right mounting system is vital, especially for roof-mounted systems where compatibility with your roof type is key. If you opt for a ground-mounted system, remember that it requires extra structural components such as poles and concrete for secure anchoring.
Acquiring Additional Components
For systems that are off-grid or hybrid, solar batteries are essential. Select a battery type that aligns with your storage requirements, such as lithium-ion or lead-acid. Also, ensure you have the appropriate cabling and connectors, like the right gauge of solar cables and MC4 connectors, to link your panels to the inverter.
Considerations for DIY Installation
When assembling your kit and tools, make sure all components are compatible and meet your system’s design requirements. Opt for products with robust warranties and reliable customer support. Additionally, purchasing from local suppliers can be advantageous for easier returns or exchanges if necessary.
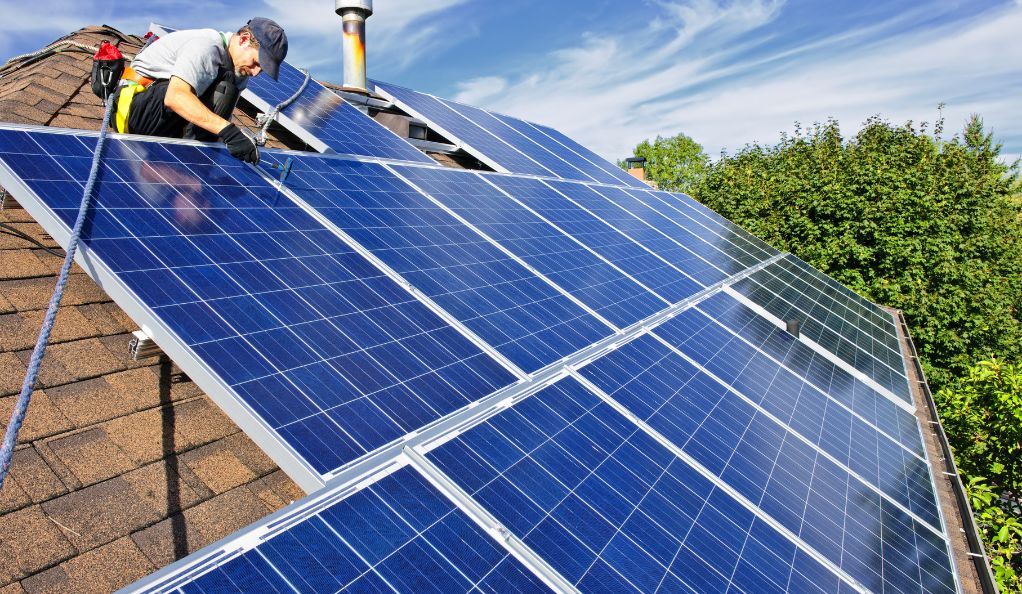
Installation Steps for DIY Solar Panels
Embarking on the installation phase of your DIY solar panel project requires careful attention to detail and adherence to safety protocols. This step-by-step guide will help you navigate through the process of installing your solar panel system.
- Preparing the Installation Site
Before you begin, ensure that the installation area, whether it’s your roof or a ground mount, is clean and ready for installation. Remove any debris, trim nearby trees to minimize shading, and ensure that the surface is stable and capable of supporting the solar panels and mounting system. - Installing the Racking System
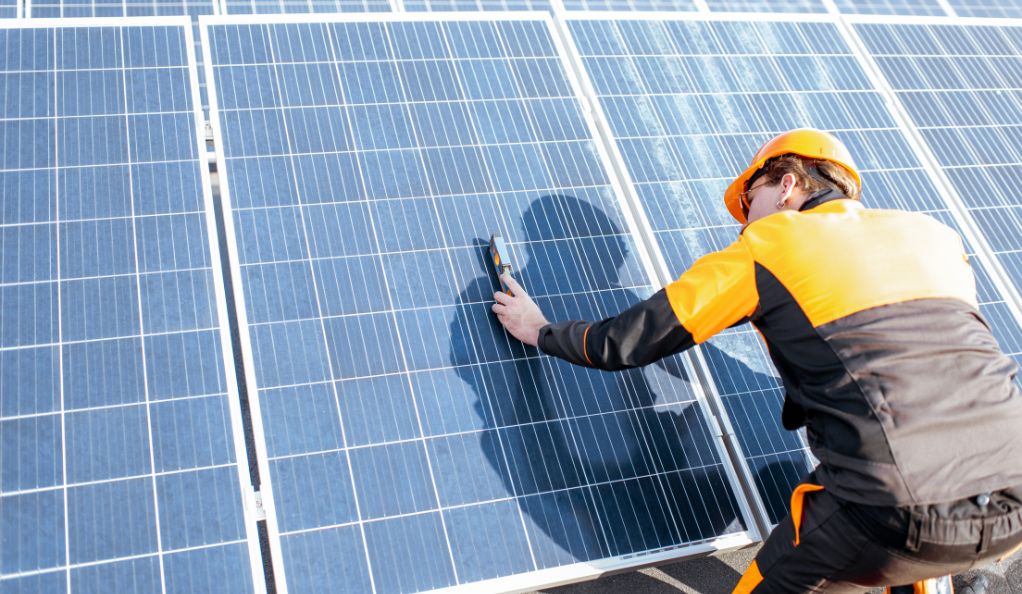
The racking system provides the foundation for your solar panels. Whether you’re installing on the roof or on the ground, the process involves securing the racks in place while ensuring they are perfectly aligned and leveled.
- For Roof Mounts: Begin by locating the rafters using a stud finder. Secure the mounting brackets to the rafters, ensuring that they are evenly spaced and aligned. It’s crucial to seal any penetrations to prevent leaks.
- For Ground Mounts: Install the ground mounts and secure them with concrete. Make sure they are properly aligned and at the correct angle for optimal sun exposure.
- Mounting the Solar Panels
With the racking system in place, you can start mounting the solar panels. Carefully lift each panel onto the rack and secure it using the provided clamps or bolts. Ensure that all panels are securely fastened and aligned. - Wiring the Solar Panels
Wiring is a critical step that should be done with precision. Connect the solar panels to each other in series or parallel, depending on your system’s requirements. Ensure that all connections are tight and secure. Use appropriate wiring conduits to protect the wires from environmental factors.
- Safety Note: It’s advisable to work with the panels in a de-energized state to avoid any electrical hazards.
- Connecting to the Inverter
The inverter converts the DC electricity generated by the solar panels into AC electricity usable in the home. Connect the output wires from the solar panels to the inverter, ensuring that the polarity is correct. - Grounding the System
Proper grounding is essential for safety and system performance. Ensure that the racking system, solar panels, and inverter are all properly grounded according to local electrical codes. - Final Checks and Testing
Once everything is installed and connected, inspect the entire system to ensure that all components are securely fastened and properly wired. Test the system to verify that it’s functioning correctly. This may involve checking the inverter display and monitoring system performance. - Safety and Compliance
Always adhere to local building codes and electrical standards. If you’re not confident in your ability to safely handle electrical components, consider consulting a professional electrician.
Installing solar panels is a complex but rewarding task. While it requires a significant amount of effort and attention to detail, the sense of achievement and the benefits of producing your own renewable energy are well worth it.
Connecting and Commissioning Your Solar System
After successfully installing your solar panels and inverter, the final steps involve connecting your system to your home’s electrical network and commissioning it for use. This phase is crucial for ensuring that your solar system operates efficiently and safely, providing you with renewable energy for years to come.
Connecting to the Electrical Panel
The process begins with ensuring the main power to your home is shut off for safety. Installing a Photovoltaic (PV) disconnect is a critical step, as it allows you to safely shut off the solar system’s power when needed. The solar inverter is then connected to your home’s electrical panel. This connection involves running wiring from the inverter to the panel and installing a new breaker specifically for the solar system. It’s essential to ensure that the wiring and breaker match the system’s power requirements.
Grid Connection and Net Metering (If Applicable)
For grid-tied systems, the connection to the utility grid is a crucial step, often requiring coordination with the local utility company for net metering arrangements. This setup allows homeowners to feed excess solar-generated electricity back into the grid. In many cases, the utility company will install a net meter capable of tracking both the consumption and the excess electricity fed into the grid.
System Testing and Commissioning
Once your system is connected, the initial testing phase ensures everything is functioning correctly. This includes checking the inverter display and the monitoring system under different load conditions. Ensuring that all electrical connections are secure and that the system is properly grounded is a vital safety measure.
Inspection and Approval
Local authority inspection of the installed solar system is a standard requirement for compliance with electrical and safety codes. Passing this inspection leads to receiving the permission to operate (PTO) from the local authority or utility company, which officially commissions the system for use.
Monitoring System Setup
Setting up a monitoring system is a crucial step for tracking the performance of your solar panels. Most monitoring systems can be accessed via an app or a web-based platform, providing real-time insights into the system’s performance.
Documentation and Manuals
Finally, keeping all documentation, including manuals, warranties, and system diagrams, is essential for future reference. This information is crucial for troubleshooting, maintenance, or any future modifications to the system.
The process of connecting and commissioning your solar system is the culminating step of your installation journey. It involves careful electrical work, adherence to local regulations, and often, coordination with utility companies. Once completed, it marks the beginning of generating your own renewable energy.
Maintaining Your DIY Solar Panel System
Your DIY solar panel system is now up and running, providing you with clean, renewable energy. To ensure it continues to operate efficiently and effectively over the years, proper maintenance is essential. This section will guide you through the key aspects of maintaining your solar panel system.
Regular Cleaning: To keep your solar panels performing optimally, regularly remove dirt, dust, leaves, and bird droppings. Use a soft brush or a gentle stream of water to avoid damaging the panels. Cleaning frequency may vary based on location and weather conditions.
Monitoring Performance: Utilize the online monitoring capabilities of your solar system to check if it’s generating the expected amount of electricity. Promptly investigate and address any unexpected drops in production.
Trim Surrounding Vegetation: Prevent shading, which can reduce energy production, by trimming or pruning trees and vegetation near the solar panels.
Inspect for Damage: Periodically inspect the panels, mounting system, and wiring for signs of damage or wear and tear. Address any issues immediately. Consider scheduling a professional inspection every few years to assess the system’s overall condition.
Check for Pests: Keep an eye out for birds or pests that may build nests under your solar panels, and install bird deterrents if necessary.
Inverter Maintenance: Ensure the inverter is clean and free from dust. While most inverters are sealed and require minimal internal maintenance, check for firmware updates from the manufacturer and follow their recommendations.
Battery Maintenance (if applicable): If your system includes lead-acid batteries, regularly check and top up the electrolyte levels with distilled water. Lithium-ion batteries typically require minimal maintenance but should be periodically inspected for any unusual behavior.
Snow and Ice Removal: In regions with heavy snowfall, consider investing in snow removal tools or heating systems to prevent snow and ice buildup on the panels.
Warranty Coverage: Familiarize yourself with the warranties on your solar panels, inverters, and other components. Understand what is covered and for how long.
Professional Assistance: If you’re unsure about any maintenance tasks or notice a significant drop in performance, consult a professional solar technician for guidance and assistance.
Proper maintenance is crucial for ensuring the longevity and efficiency of your DIY solar panel system. By following these guidelines and monitoring your system’s performance, you can continue to enjoy the benefits of clean and renewable energy for years to come. Regular maintenance not only maximizes energy production but also helps identify and address potential issues early, reducing long-term repair costs.
Conclusion
Congratulations on completing your DIY solar panel installation journey! You’ve taken a significant step towards reducing your carbon footprint and achieving energy independence. In this guide, you learned about solar energy fundamentals, site assessment, equipment acquisition, and the detailed installation process. You also gained insights into connecting your system, performing essential maintenance, and ensuring its long-term efficiency.
While DIY solar installation is achievable, it requires careful planning and safety measures. Seek professional assistance if needed. With your solar panels in place, you’re part of the clean energy movement, making a positive impact on the planet while enjoying the benefits of renewable energy. Thank you for embracing solar energy and contributing to a more sustainable future. Happy solar panel ownership!