
Outdoor lighting not only enhances the aesthetics of your outdoor space but also adds functionality and security to your property. However, traditional outdoor lighting systems can be expensive to install and maintain, not to mention the strain they put on the environment due to their energy consumption.
But what if there was a way to illuminate your outdoor areas while reducing your carbon footprint and cutting down on energy costs? Enter DIY solar lighting systems – an eco-friendly and cost-effective solution that harnesses the power of the sun to brighten up your outdoor world. In this comprehensive guide, we will take you through the process of creating your own DIY solar lighting system, from understanding the basics of solar power to planning and installation.
The Benefits of DIY Solar Lighting Systems
Before we dive into the nitty-gritty of setting up your solar lighting system, let’s explore some of the key benefits:
- Sustainability: DIY solar lighting systems are an excellent choice for environmentally conscious individuals. By utilizing the sun’s energy, you reduce your reliance on non-renewable resources, lower greenhouse gas emissions, and contribute to a greener planet.
- Energy Cost Savings: Once your DIY solar lighting system is up and running, it operates virtually cost-free. Solar panels convert sunlight into electricity, which powers your lights after dark, eliminating the need for expensive electricity bills.
- Low Maintenance: Solar lighting systems are remarkably low-maintenance. With no moving parts and durable components, they require minimal attention. Regular cleaning and occasional battery replacements are all it takes to keep them running smoothly.
- Easy Installation: While the idea of setting up solar panels may seem daunting, DIY solar lighting systems are designed to be user-friendly. You don’t need to be a technical expert to install them successfully.
- Versatility: Solar lighting can be used in various outdoor applications, from lighting up garden paths and driveways to creating a captivating ambiance for outdoor gatherings. The versatility of solar lights allows you to get creative with your outdoor lighting design.
Understanding Solar Power
How Solar Panels Work
Solar panels are the heart of any solar lighting system. They work on a simple yet ingenious principle – converting sunlight into electricity through a process known as the photovoltaic effect. Here’s a brief overview of how it works:
- Absorption of Sunlight: Solar panels are made up of numerous photovoltaic cells, usually composed of silicon. When sunlight hits these cells, they absorb photons (particles of sunlight).
- Generation of Electricity: The absorbed photons energize electrons within the cells, causing them to become mobile. This movement of electrons creates an electric current.
- Direct Current (DC): The electric current generated by the cells is in the form of direct current (DC) electricity, which is then collected by the solar panel’s wiring.
- Inverter Conversion: Since most household appliances and lighting systems run on alternating current (AC), an inverter is used to convert the DC electricity from the solar panels into AC electricity, making it compatible with your lighting fixtures.
Types of Solar Panels for DIY Projects
When embarking on a DIY solar lighting project, it’s essential to choose the right type of solar panel for your specific needs. Here are the most common types:
- Monocrystalline Solar Panels: These panels are known for their high efficiency and space-saving design. Monocrystalline panels are excellent for limited roof or installation space.
- Polycrystalline Solar Panels: Polycrystalline panels are slightly less efficient than monocrystalline ones but are more affordable. They are a great choice for budget-conscious DIYers.
- Thin-Film Solar Panels: Thin-film panels are lightweight and flexible, making them suitable for unconventional installation surfaces, such as curved structures or portable applications.
- Amorphous Silicon Solar Panels: These panels are highly adaptable and can perform well in low-light conditions, making them ideal for areas with frequent cloud cover or shading.
Calculating Your Energy Needs
Before you start purchasing solar panels, it’s crucial to determine your energy requirements. Calculate the total wattage of the LED lights you plan to use in your outdoor space and estimate the number of hours they will be on each night. This will help you determine the overall energy consumption of your lighting system.
Here’s a simple formula to get you started:
Total Energy Consumption (Wh) = Total LED Wattage (W) x Number of Hours Used per Night (h)
Once you have the total energy consumption, you can choose the appropriate solar panels and battery capacity to meet your needs effectively.
Essential Components
Solar Panels and Their Specifications
The backbone of your DIY solar lighting system is the solar panel. To ensure the efficiency and effectiveness of your system, it’s essential to select the right solar panels and understand their specifications:
- Wattage (W): Solar panels are rated by their maximum output in watts (W). Higher wattage panels produce more electricity, but they may also be larger and more expensive.
- Efficiency: Efficiency refers to the ability of a solar panel to convert sunlight into electricity. Higher efficiency panels are more productive in low-light conditions but can be pricier.
- Size and Dimensions: Consider the physical dimensions of the solar panels to ensure they fit the installation space you have available.
- Mounting Options: Some solar panels are designed for roof mounting, while others are suitable for ground installation or pole mounting. Choose panels that match your intended setup.
Batteries for Storing Solar Energy
To keep your outdoor lights powered during the night or on cloudy days, you’ll need batteries to store the energy generated by your solar panels. Key considerations for solar batteries include:
- Capacity (Ah or kWh): The capacity of a battery determines how much energy it can store. Choose a battery with sufficient capacity to meet your lighting needs.
- Voltage (V): Battery voltage should match the voltage requirements of your lighting system. Common options include 12V and 24V batteries.
- Battery Chemistry: Common types of batteries used in solar applications include lead-acid, lithium-ion, and gel batteries. Each has its advantages and disadvantages in terms of lifespan, maintenance, and performance.
LED Lights for Efficient Illumination
Light-emitting diode (LED) lights are the ideal choice for solar lighting systems due to their energy efficiency and long lifespan. When selecting LED lights for your project:
- Wattage and Lumens: Choose LEDs with the appropriate wattage and lumens output to meet your lighting requirements. LED lights are available in various brightness levels.
- Color Temperature: Consider the color temperature of the LEDs, as it can affect the ambiance of your outdoor space. Warmer color temperatures (around 2700K) provide a cozy glow, while cooler temperatures (5000K and above) offer a more daylight-like appearance.
- Waterproofing and Durability: Ensure that the LED lights you select are designed for outdoor use and have appropriate waterproofing to withstand the elements.
Charge Controllers and Inverters
Charge controllers and inverters play critical roles in your solar lighting system:
- Charge Controllers: These devices regulate the flow of electricity from the solar panels to the batteries, preventing overcharging and deep discharge, which can damage the batteries. Choose a charge controller suitable for the voltage of your system.
- Inverters: If your lighting fixtures require AC power and your solar panels generate DC electricity, an inverter is necessary. It converts DC electricity into AC, making it compatible with your lights.
Planning Your Solar Lighting System
Assessing Your Outdoor Space
Before you start assembling your DIY solar lighting system, it’s essential to assess your outdoor space thoroughly. This assessment will help you determine the best placement for solar panels, lights, and other components.
- Sunlight Exposure: Identify the areas in your outdoor space that receive the most sunlight throughout the day. Solar panels should ideally be installed in locations with maximum exposure to sunlight to maximize energy production.
- Shading and Obstacles: Take note of any potential shading from trees, buildings, or other objects that could block sunlight from reaching your solar panels. Minimizing shading is crucial for optimal system performance.
- Safety Considerations: Ensure that your solar lighting system is installed in a safe location, away from potential hazards such as water features, high-traffic areas, or fire risks.
Choosing the Right Solar Lighting Design
Once you’ve assessed your outdoor space, it’s time to choose a solar lighting design that suits your needs and preferences. Here are some popular options:
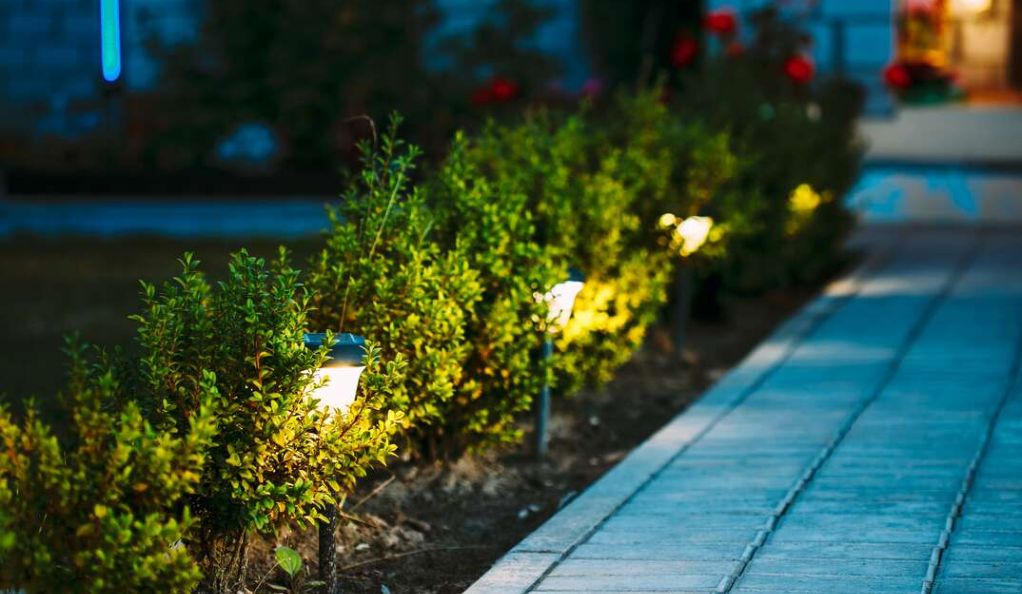
- Pathway Lighting: Illuminate walkways, driveways, and garden paths with solar-powered pathway lights. These fixtures are easy to install and enhance both safety and aesthetics.
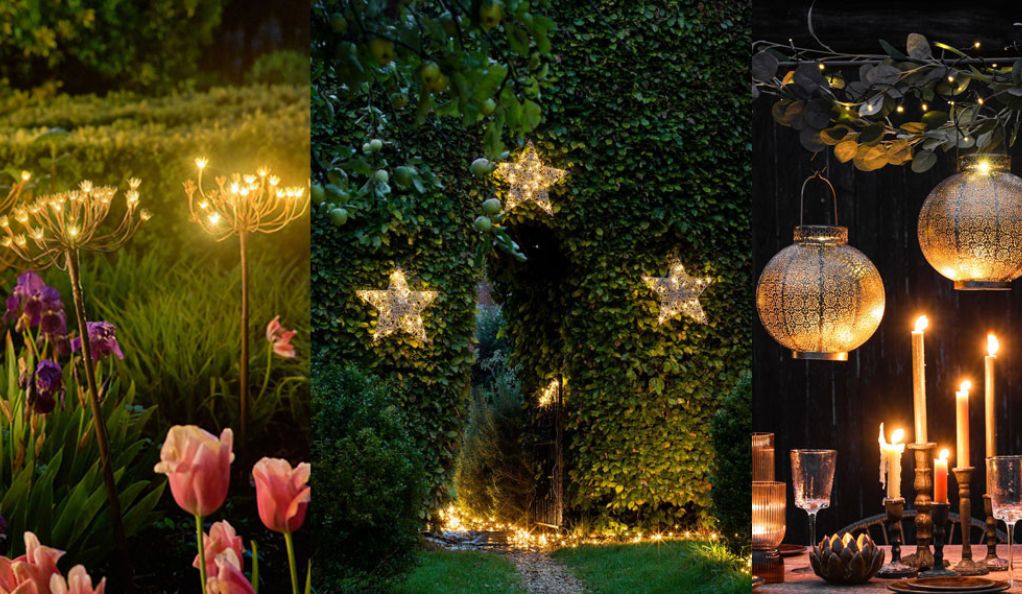
- Garden Accents: Use solar lights to highlight specific garden features, such as flower beds, sculptures, or architectural elements. Solar spotlights and uplights work well for this purpose.
- Outdoor String Lights: Create a magical ambiance for outdoor gatherings by stringing solar-powered lights across your patio, pergola, or garden. They provide a warm and inviting atmosphere without the need for electrical wiring.
- Solar Lanterns: Add a touch of charm to your outdoor space with solar lanterns. These decorative lights are available in various styles and can be hung from trees or placed on tabletops.
Calculating the Number of Lights and Panels Needed
To ensure that your DIY solar lighting system provides adequate illumination, it’s crucial to calculate the number of lights and panels required. Here’s a basic guideline:
- Determine Lighting Needs: Calculate the total wattage of the LED lights you plan to use and the number of hours they will be on each night. This will give you the total energy consumption in watt-hours (Wh).
- Panel-to-Lighting Ratio: Generally, a 1:1 ratio of solar panel wattage to LED light wattage is a good starting point. For example, if your LED lights total 100W, aim for 100W of solar panels.
- Battery Capacity: Your battery capacity should be sufficient to store at least one day’s worth of energy to ensure your lights can operate even during cloudy days or nights with extended use.
Step-by-Step Installation
Mounting Solar Panels
Mounting the solar panels correctly is crucial for maximizing their exposure to sunlight and the efficiency of your solar lighting system. Follow these steps:
- Select a Suitable Location: Choose a location with maximum sunlight exposure throughout the day. Ensure that the mounting surface is sturdy and can support the weight of the panels.
- Angle and Tilt: To optimize energy production, angle the solar panels toward the equator (south in the northern hemisphere, north in the southern hemisphere) at an angle equal to your latitude. You can adjust the angle seasonally for best results.
- Secure Mounting Brackets: Install the mounting brackets securely on the chosen surface. Make sure they are level and aligned correctly.
- Attach the Panels: Carefully attach the solar panels to the mounting brackets. Ensure they are firmly secured and do not wobble.
- Connect Wiring: Connect the wiring from the solar panels to the charge controller. Follow the manufacturer’s instructions for proper wiring connections.
Connecting Batteries and Charge Controllers
Properly connecting the batteries and charge controller is essential for the safe and efficient operation of your solar lighting system:
- Battery Placement: Install the batteries in a cool and dry location, protected from direct sunlight and extreme temperatures.
- Connect Batteries: Connect the batteries to the charge controller using the appropriate cables and connectors. Ensure proper polarity and tight connections.
- Connect Solar Panels: Attach the wires from the solar panels to the charge controller, following the manufacturer’s guidelines.
- Set Charge Controller Parameters: Configure the charge controller settings to match your battery type (e.g., lead-acid or lithium-ion) and voltage.
Wiring LED Lights
Wiring your LED lights correctly ensures they receive power from the battery and operate as intended:
- Plan Wiring Layout: Plan the wiring layout, keeping it neat and organized to prevent tangling or damage.
- Connect LED Lights: Connect the wiring from your LED lights to the battery through a switch or timer, depending on your preferences for controlling when the lights turn on and off.
- Secure Connections: Ensure all connections are secure and insulated to prevent exposure to the elements.
Testing and Troubleshooting
Before finalizing your DIY solar lighting system, perform thorough testing to identify and address any issues:
- Initial Test: Turn on your solar lights and verify that they illuminate as expected. If not, check wiring connections and battery charge.
- Check for Shading: Monitor the system’s performance over several days to ensure that shading or obstructions are not affecting energy production.
- Battery Health: Regularly check the state of charge and health of your batteries. Most charge controllers have indicators or monitoring features.
- Troubleshooting: If you encounter any issues, consult the manufacturer’s documentation or seek assistance from experts in solar installations.
By following these installation steps and conducting proper testing, you can ensure that your DIY solar lighting system operates efficiently and reliably.
Creative Solar Lighting Ideas
Solar Pathway Lights
Illuminate Your Path: Solar pathway lights are a practical and elegant addition to your outdoor space. They guide guests along walkways, driveways, or garden paths, enhancing safety and aesthetics. These lights are available in various designs, including traditional lantern styles and modern, sleek options.
Installation Tips: Space them evenly along your pathways, ensuring they receive adequate sunlight during the day for nighttime illumination. Consider using warm-white LED lights for a welcoming ambiance.
Solar Garden Accents
Highlight Garden Features: Use solar-powered spotlights or uplights to accentuate the beauty of your garden. Illuminate trees, shrubs, statues, or flower beds to create a captivating nighttime display. Adjustable solar spotlights offer flexibility in directing light precisely where you want it.
Installation Tips: Position the spotlights strategically to create captivating shadows and focal points. Experiment with different angles to achieve the desired effect.
Solar-Powered Outdoor String Lights
Create an Enchanting Atmosphere: Solar string lights are perfect for adding a touch of magic to outdoor gatherings, whether it’s a garden party, a romantic dinner, or a cozy evening on your patio. Hang them across pergolas, along fences, or drape them through trees for a delightful ambiance.
Installation Tips: Ensure the solar panel of the string lights is placed in a sunny spot to charge during the day. Opt for weather-resistant and durable string lights designed for outdoor use.
Solar Lanterns and Spotlights
Charming Decorative Lighting: Solar lanterns are versatile and decorative, making them ideal for tabletops, pathways, or hanging from hooks or branches. Solar spotlights can be used to draw attention to specific features or architectural details.
Installation Tips: Experiment with the placement of solar lanterns to create a cozy and inviting atmosphere. Hang lanterns from shepherd’s hooks for an enchanting garden display.
Solar Security Lights
Enhanced Safety and Security: Solar-powered security lights are an eco-friendly way to brighten up dark areas around your property, deterring potential intruders. They are equipped with motion sensors, ensuring they activate when needed.
Installation Tips: Place security lights near entrances, pathways, or any areas that require increased visibility at night. Adjust the motion sensor settings to your preference.
These creative solar lighting ideas offer endless possibilities for transforming your outdoor space into a captivating and functional environment. Whether you choose to illuminate pathways, accentuate garden features, or create a cozy ambiance, solar lighting provides an eco-friendly and cost-effective solution for your lighting needs.
Maintenance and Care
Cleaning Solar Panels and Lights
Regular Maintenance: To ensure the efficiency of your DIY solar lighting system, periodic cleaning is essential. Over time, dust, dirt, and debris can accumulate on solar panels and light fixtures, reducing their effectiveness.
Cleaning Steps:
- Solar Panels: Gently wipe the solar panels with a soft, lint-free cloth or sponge. Use a mild detergent and water solution for stubborn stains. Ensure that the panels are dry before reconnecting them.
- Light Fixtures: Clean the light fixtures to remove dirt and debris. Ensure that the LED lights remain unobstructed for optimal brightness.
Replacing Batteries and LED Bulbs
Battery Replacement: Batteries have a limited lifespan and may need to be replaced after a few years of use. Signs that your batteries need replacement include a noticeable decrease in lighting duration or brightness.
LED Bulb Replacement: LED bulbs typically have a long lifespan, but they can eventually wear out. If you notice dimming or flickering of lights, it may be time to replace the LED bulbs.
Safety First: When replacing batteries or bulbs, disconnect the solar panel and turn off the power to prevent electrical accidents.
Seasonal Adjustments and Winter Storage
Winter Considerations: In regions with harsh winters, it’s advisable to take precautions during the cold season. If your area experiences freezing temperatures, consider:
- Removing Solar Panels: Remove solar panels and store them indoors to protect them from snow and ice accumulation.
- Battery Maintenance: Disconnect and store batteries in a cool, dry place. Charge them periodically to maintain their health.
- Reduced Usage: Expect reduced lighting performance during winter due to shorter days and less sunlight. Adjust your expectations accordingly.
Spring Reinstallation: When spring arrives, reinstall and reconnect all components, ensuring that they are in good working condition.
By performing regular maintenance, including cleaning, battery replacement, and winter storage precautions, you can extend the lifespan of your DIY solar lighting system and keep it operating at its best.
Sustainability and Cost Savings
Environmental Benefits of Solar Lighting
Reducing Carbon Footprint: DIY solar lighting systems are a sustainable choice that reduces your reliance on fossil fuels and lowers greenhouse gas emissions. By harnessing the power of the sun, you contribute to a cleaner and greener environment.
Minimizing Light Pollution: Solar lights are directional and emit light where needed, reducing light pollution that can disrupt ecosystems and affect wildlife.
Calculating Your Savings
Initial Investment: While the initial setup cost of a DIY solar lighting system may be higher than traditional lighting, it is an investment that pays off over time.
Savings Over the Years: Consider the long-term savings in energy costs. Solar lighting systems have minimal operational costs, as they rely on free sunlight. Over the years, you can expect significant savings on your electricity bills.
Return on Investment (ROI): Calculate the ROI by comparing the initial investment with the cumulative savings on energy costs. Most DIY solar lighting systems pay for themselves within a few years.
Long-Term Investment in Renewable Energy
Sustainable Energy Source: Solar energy is a renewable resource with a virtually infinite supply. Your DIY solar lighting system demonstrates your commitment to sustainable and eco-friendly practices.
Increase in Property Value: Solar installations can increase the resale value of your property. Potential buyers often appreciate the cost savings and environmental benefits associated with solar lighting.
Safety and Precautions
Electrical Safety Tips
Safety First: When working with any electrical components, safety should be a top priority. Here are some essential electrical safety tips:
- Turn Off Power: Always turn off the power supply to your solar lighting system before performing any maintenance or installation tasks.
- Use Proper Tools: Ensure you use the right tools and equipment for the job. Insulated tools and gloves can protect you from electrical hazards.
- Inspect Wiring: Regularly inspect the wiring of your system for signs of wear, damage, or exposed wires. Replace any damaged components promptly.
Protecting Your Solar Lighting System
Weatherproofing: Solar lighting components are designed to withstand outdoor conditions, but it’s still essential to protect them from extreme weather:
- Waterproofing: Ensure that all connections and components are waterproofed to prevent moisture damage.
- Storms and Extreme Temperatures: Securely mount solar panels and lighting fixtures to withstand strong winds, storms, and temperature fluctuations.
Routine Checks and Maintenance
Scheduled Inspections: Set a schedule for routine inspections and maintenance of your DIY solar lighting system. Regularly check for:
- Dust and Debris: Clean solar panels and light fixtures to maintain optimal performance.
- Battery Health: Monitor battery voltage and health to prevent issues.
- Wiring Integrity: Ensure all wiring connections are secure and insulated.
- Lighting Operation: Test the lights periodically to confirm they are functioning correctly.
Professional Assistance: If you encounter complex issues or are unsure about any aspect of your solar lighting system, it’s wise to seek assistance from a qualified electrician or solar technician.
By following these safety precautions and best practices, you can enjoy the benefits of your DIY solar lighting system while minimizing risks and ensuring its long-term reliability.
Conclusion
In conclusion, DIY solar lighting systems offer an eco-friendly and cost-effective way to illuminate your outdoor space. From understanding the fundamentals of solar power to creative lighting ideas and proper maintenance, this guide has provided you with the knowledge to embark on your sustainable lighting journey. Whether you’re looking to enhance safety, create a charming ambiance, or reduce your carbon footprint, DIY solar lighting is a bright idea for any outdoor space.